Generating an API client for an Angular Ionic App
Von Jan Weiß am 15.01.2025
A very common setup is to have a frontend application which interacts with a REST API. Creating requests to the backend might seem like a useless and error-prone exercise. Because it is! In this article, I will show you how to generate an API client for your frontend application. Specifically, I will show you how to do it with an Ionic application (which requires an extra steps).
Swagger and OpenAPI
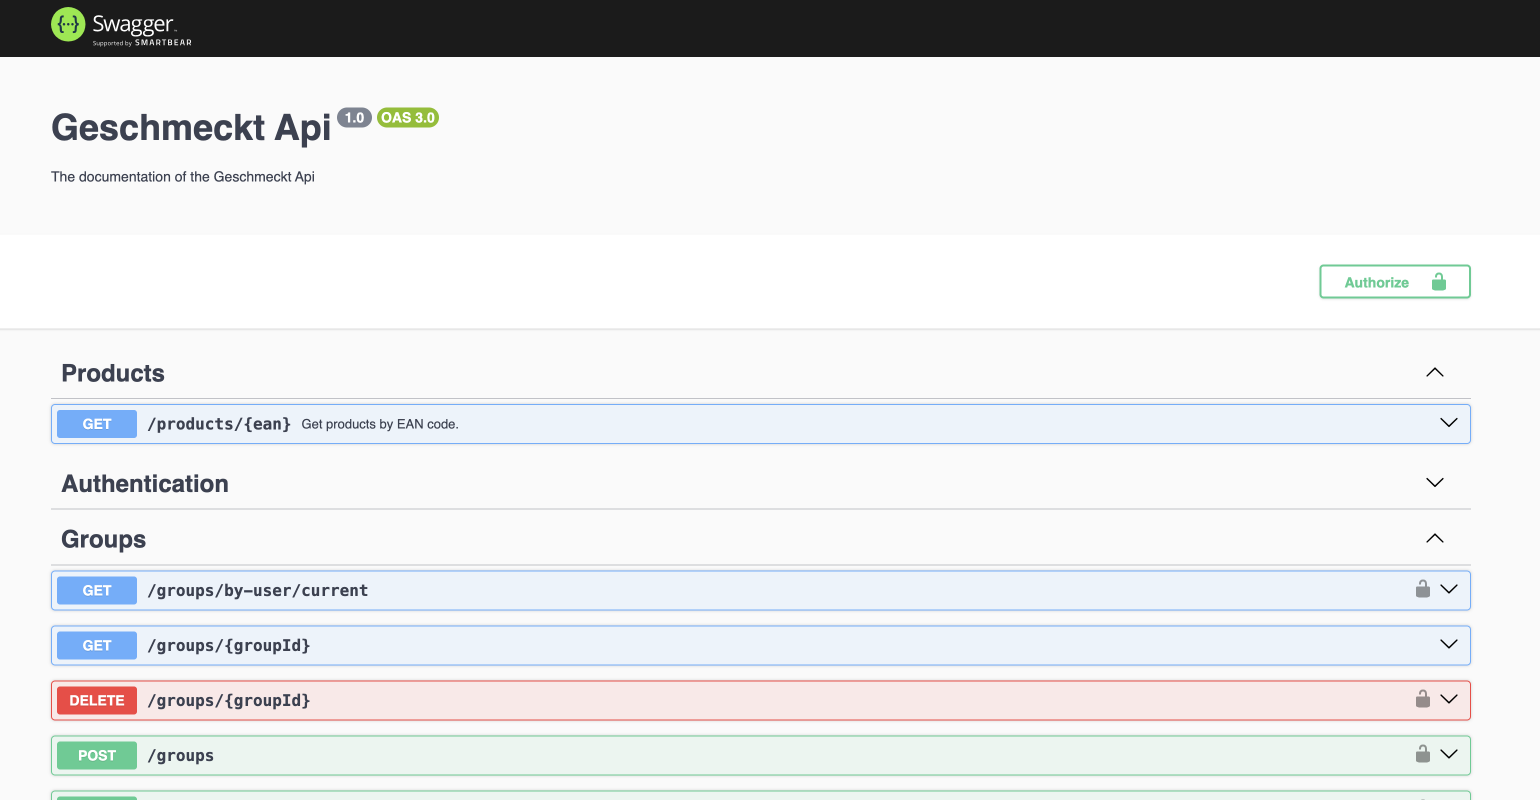
The prerequisite is that the REST API is well documented in a standardised format. For this purpose, all big frameworks such as Springboot or NestJS provide integrations for Swagger. Swagger will then generate a documentation for you in the standardised OpenAPI format. Regardless of whether you want to generate an API client, as we are doing in this article, Swagger provides great tools which will help you and your team. In the screenshot below (image 1), you can see the Swagger UI which is a user interface for testing your endpoints.

OpenAPI Generator
Now that we have a proper API documentation in the OpenAPI format, we are able to use the OpenAPI Generator to generate API clients. The OpenAPI Generator is a project which provides multiple generators to support different languages and request libraries (please go through their website to see which are supported). For our purpose, we want to use the “typescript-angular” generator. The command below will run the generator with the most important settings.
npx @openapitools/openapi-generator-cli generate -i http://localhost:3000/api-json -g typescript-angular -o ./src/api-client-i is for defining where the OpenAPI is located.
-g is for setting the generator
-o allows you to define where the output should be written
Congratulations! You generated an API client. Let’s look into the code of the API client. You will notice that the typescript-angular generator uses Angular’s HTTP client for performing requests. When you now run your Ionic app in the browser, everything should work. Most likely though, you want to configure some values such as the base url for requests or you want that credentials are added to requests. Below, you see how your main.ts file could look in this case. In the code example, I need to initiate my TokenService which stores and retrieves an authentication token from the storage.
import { bootstrapApplication } from ‘@angular/platform-browser';
import { AppComponent } from './app/app.component';
import { Configuration } from ‘./api-client';
import { TokenService } from './app/api/token.service';
import { environment } from './environments/environment';

bootstrapApplication(AppComponent, {
  providers: [
    provideAppInitializer(() => {
      const tokenService = inject(TokenService);
      return tokenService.init();
    }),
    {
      provide: Configuration,
      useFactory: (tokenService: TokenService) =>
        new Configuration({
          basePath: environment.baseUrlApi,
          credentials: {
            bearer: tokenService.getToken.bind(tokenService),
          },
        }),
      deps: [TokenService],
    },
  ],
});
Capacitor HTTP
Don’t stop reading, we are not done yet! If you are writing an Ionic app you probably want to use the Capacitor/HTTP client so that you can perform native requests. Unfortunately, there is no generator for the stack TypeScript + Angular + Capacitor/HTTP yet, but I discovered a little trick how you can make it work. By using Angular’s dependency injection, you can replace Angular’s HTTP Client with your own implementation of its interface. Your implementation can then be an adaptor between the APIs of the Angular HTTP Client and Capacitor/HTTP. This is exactly what I did in my project Geschmeckt.
Here you can see the adapter which implements the request method which is the only method that the generated API client used. Please note, that you might need to extend the code for your project.
import { HttpErrorResponse } from '@angular/common/http';
import { Injectable } from '@angular/core';
import { CapacitorHttp } from '@capacitor/core';
import { from, Observable } from 'rxjs';

@Injectable({
  providedIn: 'root',
})
export class HttpClientCapacitorAdapter {
  constructor() {}

  request<T>(
    method: 'get' | 'post' | 'delete',
    url: string,
    options?: any,
  ): Observable<T> {
    return from(
      CapacitorHttp[method]({
        headers: this.mapHeaders(options.headers),
        responseType: options.responseType,
        data: options.body,
        url,
      }).then((httpResponse) => {
        if (httpResponse.data.error !== undefined) {
          throw new HttpErrorResponse({
            ...httpResponse.data,
            status: httpResponse.status,
            statusText: httpResponse.data.error,
            url,
          });
        }
        return httpResponse.data as T;
      }),
    );
  }

  private mapHeaders(headers: any): Record<string, string> {
    if (!headers?.lazyUpdate) return {};
    return (headers.lazyUpdate as { name: string; value: string }[]).reduce<
      Record<string, string>
    >((acc, header) => {
      acc[header.name] = header.value;
      return acc;
    }, {});
  }
}
Now that you have your adapter, you can make Angular’s dependency injection use your adapter instead of the actual HttpClient. This is done in the main.ts by adding the following line to the providers.
{ provide: HttpClient, useClass: HttpClientCapacitorAdapter },Conclusion
This trick highlights how powerful Dependency Injections can be. What would be more elegant though: Create an OpenAPI generator for the stack TypeScript + Angular + Capacitor/HTTP. If you do this please publish it! ❤️ This would be a very great contribution! In the meantime, I hope that my little trick helps you.

The comments are closed.